
Path Custom Field IDs and Custom Screens allow users to add a location in their system to collect data and report on it. Custom Field IDs and Custom Screens can be accessed based on user role permissions.
Add a Custom Field ID
1. Navigate to Settings > Custom > Custom Fields.
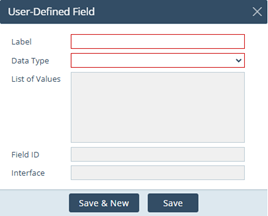
2. Select Add.
3. Enter field name into Label.
4. Select Data Type from dropdown. This will format the data when entered in Path.
- Date
- Currency
- Percent
- Text
- Dropdown – Fill in List of Values section
- Section Header
- Numeric
Add a Custom Screen
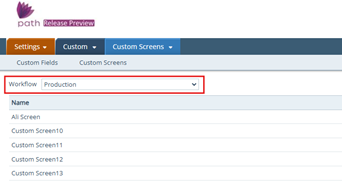
1. Navigate to Settings > Custom > Custom Screens.
2. Select where to add the new screen to from the Workflow dropdown.
3. Highlight the Custom Screen row you want to edit.
4. Enter a Screen Name, outlined in red.

5. Select Field IDs from left.
Top box is User-Defined Fields are the Custom Field IDs. Bottom box is Path Field IDs.
6. Click right arrow to add to Selected Fields on the right side of the screen.
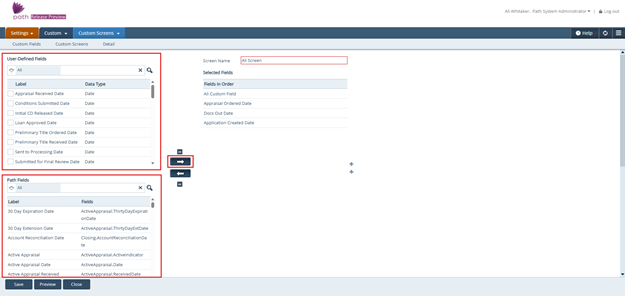
7. Select Save.
8. Select Preview will show what your Custom Screen will look like with your Selected Fields.
Turn on Custom Screen for Role
1. Navigate to Configuration > Roles > List.
2. Select Role you want to add the screen to .
3. Select Screens.
4. Expand the + icon that corresponds to the Sub-Menu Display when you created the Custom Screen.
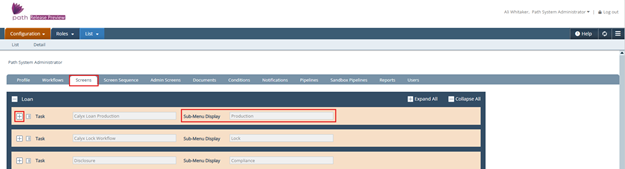
5. Scroll until you find the Screen Display Name you created for your Custom Screen.
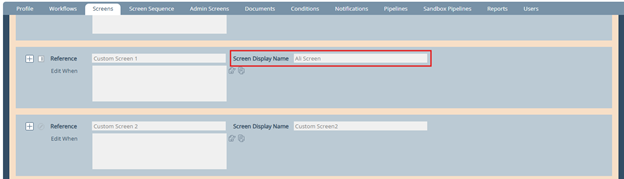
6. Select the + icon to expand Reference area.
7. Select the + icon to expand Tab area.
8. Select the / icon next to Save to turn on. It will have an eye icon when on.
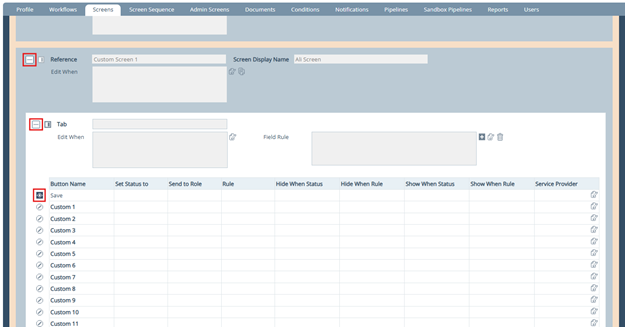
9. Select the paper icon.

10. Highlight status from the left and click the right icon to move them to Selected Status.
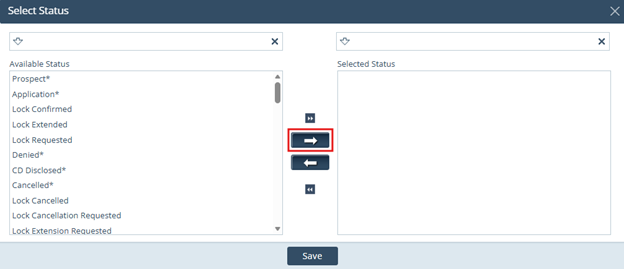
11. Select the Save.
