
Use the Form Library to create and manage custom Word and PDF forms, map loan data, and make documents available to Path users.
PREREQUISITES:
- Have the custom form available in Word or PDF format.
- Confirm the form’s category, type, and mapping requirements.
- Identify the Path field IDs needed for mapped loan data.
BUILD THE WORD MERGE FIELDS:
- Open the Word document in Microsoft Word and add mapped fields, as needed.
- Use Path Field to locate the required loan field ID.
- Open My Profile, select Show Path Field ID, and click Save.

- Open the loan screen containing the required field.
- Click the green arrow above the field.
- Copy the complete red field ID, preserving the exact capitalization.
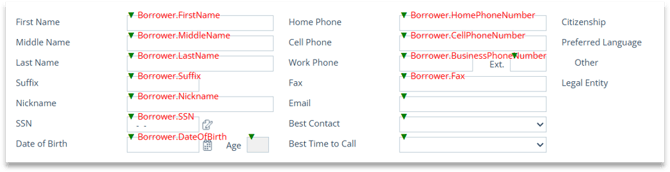
- Open My Profile, select Show Path Field ID, and click Save.
- Place the cursor in the Word document where the field should appear.
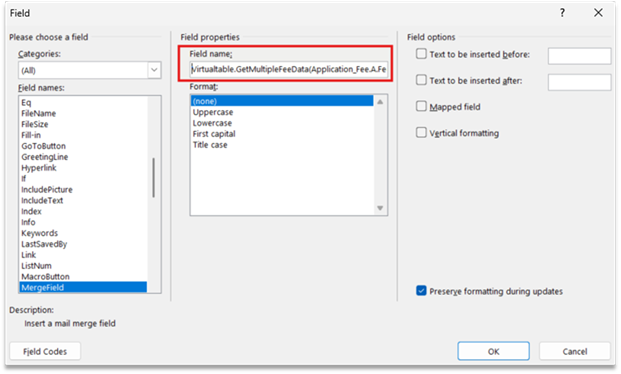
- Select Insert > Quick Parts > Field.
- Select MergeField.
- Enter the complete Path field ID, keep Preserve formatting during updates selected, and click OK.
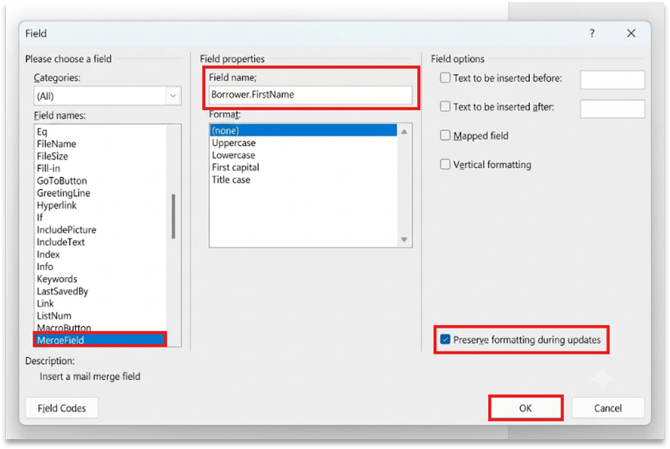
- Repeat these steps for each mapped value.
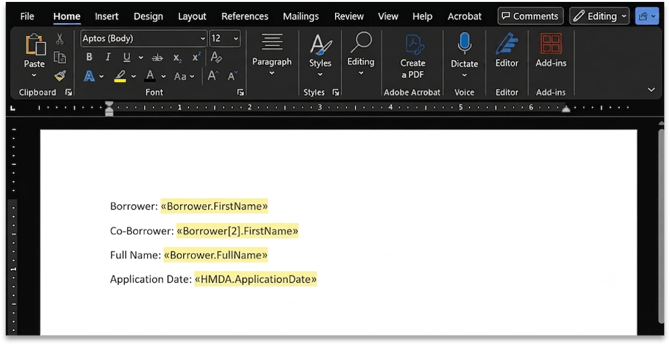
ADD A CO-BORROWER FIELD ID
- Locate the borrower field ID, such as Borrower.FirstName.
- Add the co-borrower position in square brackets after Borrower:
Borrower[2].FirstName - In Word, place the cursor where the co-borrower value should appear.
- Select Insert > Quick Parts > Field.
- Select MergeField, enter Borrower[2].FirstName in the Field Name box, and click OK.
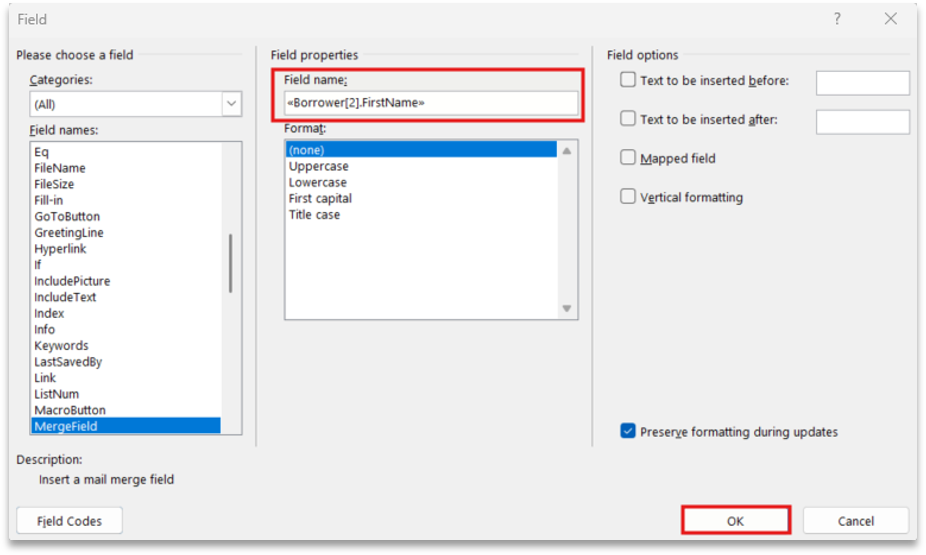
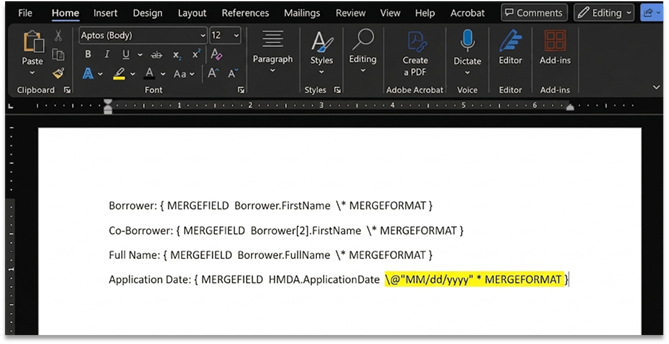
- Press Alt + F9 and confirm the field code displays correctly:
{ MERGEFIELD Borrower[2].FirstName \* MERGEFORMAT }
FORMAT A DATE FIELD
Use the following Word keyboard commands while building and checking the form:
- Press Alt + F9 to expand and enter the field code.

|
Example: { MERGEFIELD HMDA.ApplicationDate \@ "MM/dd/yyyy" \ * MERGEFORMAT } |
|
|
CREATE A FEE FIELD ID
- Start each Fee Field ID with Virtualtable.GetMultipleFeeData.
- Add an opening parenthesis “ ( “ immediately after it.
- Replace each space in the fee name with an underscore (_). For this example, use Application Fee and replace the space with an underscore: Application_Fee.
- Add a period, enter the applicable Fees Worksheet section letter, and add another period.
- Enter the value to populate, such as FeeAmount, and add a closing parenthesis “ ) “.
- Use the following format: Fee_Name.Section.Value
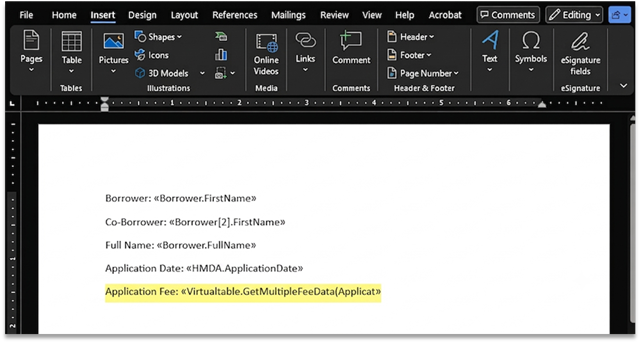
- Copy the completed fee field ID and insert it into the document using Insert > Quick Parts > Field.
EXAMPLE
Virtualtable.GetMultipleFeeData(Application_Fee.A.FeeAmount)
|
|
UPLOAD THE FORM TO PATH:
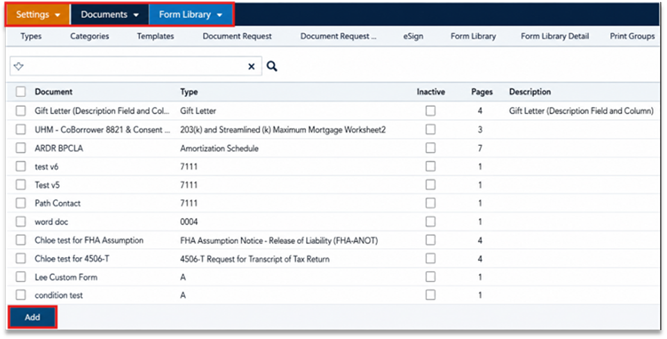
- Sign in under the System Admin role, then go to Settings > Documents > Form Library.
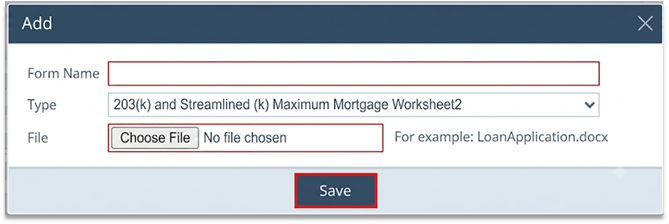
- Click Add.
- Enter the Form Name.
- Select Type. This classification controls the available options or behavior.
- Choose the Word or PDF file.
- Click Save.
|
|
CONFIGURE AND MAITAIN THE FORM:
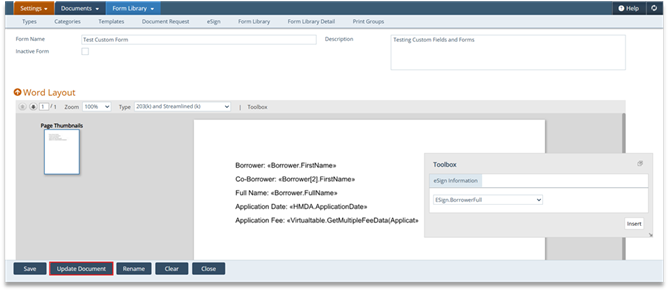
- Open the form and verify the Form Name, Description, Type, page count, Inactive Form setting, and Word Layout.
- Use the Toolbox to add or reposition fields:
- Confirm existing merge fields display correctly in Word Layout before adding Toolbox fields. Avoid duplicate mappings.
- For eSign, open eSign Information, select the signer, click Insert, and position the signature field.
- To revise the form, save and close the Word file, click Update Document, select the revised file, and verify the layout and mappings. Use Save for form detail changes.
TEST THE FORM IN A LOAN:
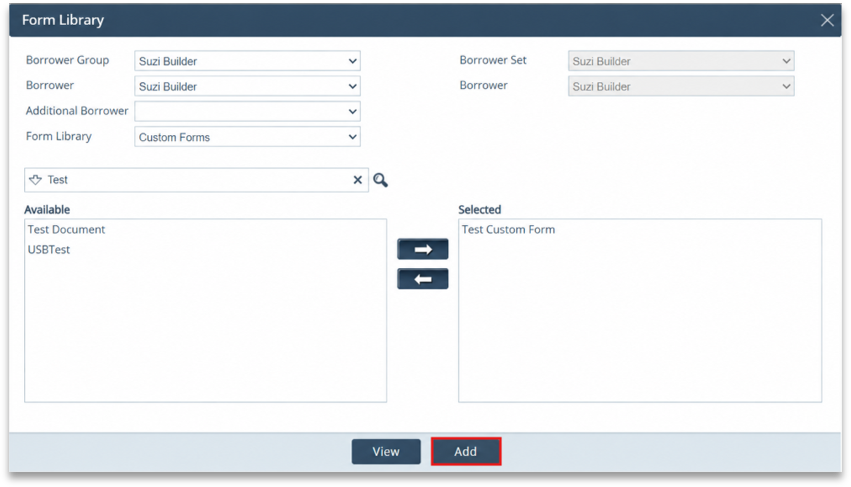
- Switch to the applicable Loan Officer role, open the test loan, and go to Documents > List > Add from Library.
- Confirm the Borrower Group, Borrower Set, and Borrower.
- From the Form Library dropdown, select Custom Forms.
- Find the form, select it under Available, and move it to Selected.
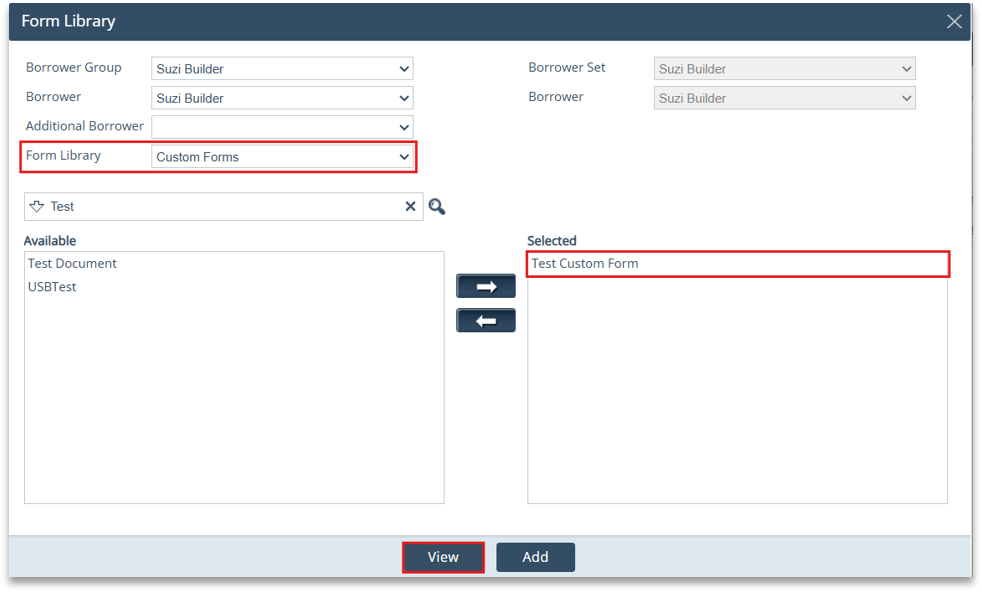
- Click View and compare the form with the test loan data.
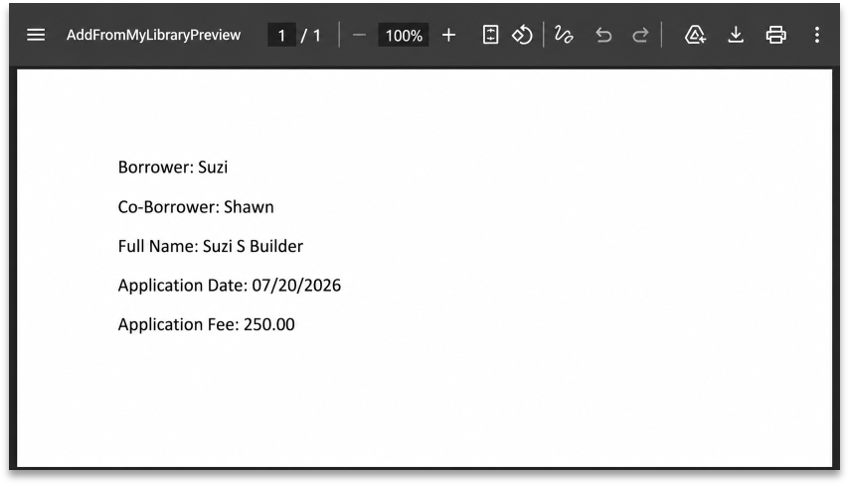
- Correct any missing, duplicate, incorrect, or improperly formatted values. Update the document and repeat the preview as needed.
- When correct, click Add.
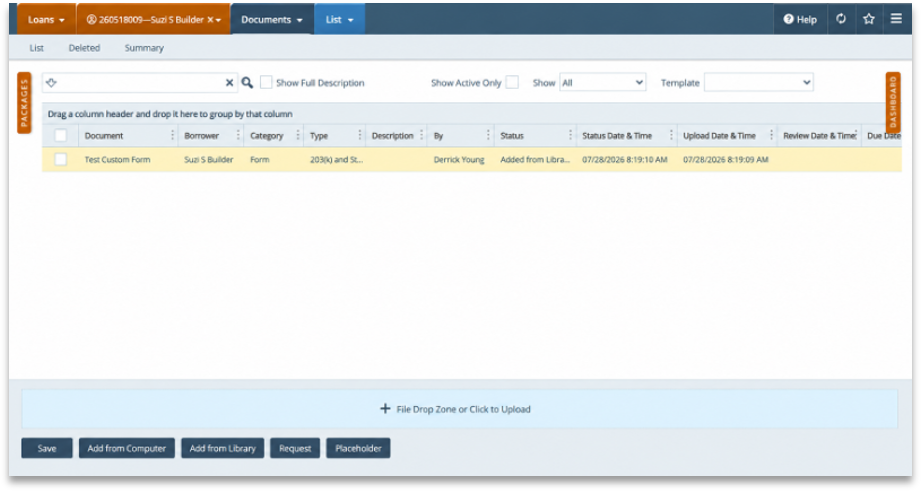
- Confirm the form appears in Documents, then select View Document Information.
- When finished, return to My Profile, clear Show Path Field ID, and click Save.

Properly configured custom forms streamline document preparation, reduce manual entry, and ensure mapped loan data and signature fields are ready for use throughout the loan workflow.
