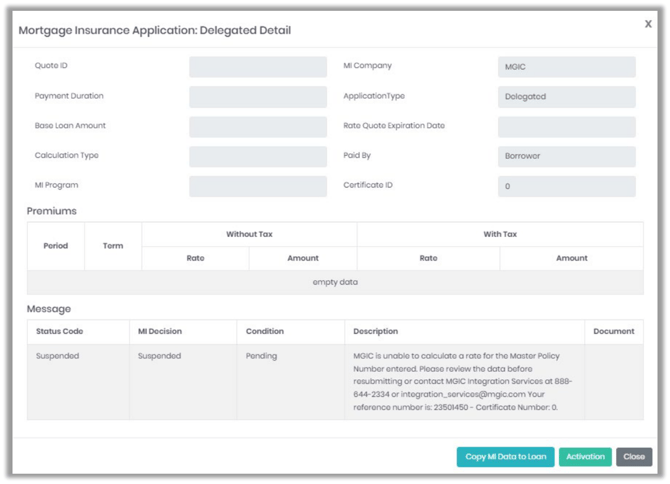
The MI Application tool enables users to:
• Submit MI applications
• Upload required underwriting documents (for Non-Delegated orders)
• Check application status
• View MI company responses
• Activate MI coverage once approved
This process begins after an MI rate quote has been selected.
Summary
The MI Application tool streamlines the process of submitting and managing MI applications. It ensures consistency by using Path’s auto-filled borrower and loan details, supports document uploads for Non-Delegated orders, and provides clear steps for activation at closing.
Available Actions in MI Application
Once you select an MI quote, you can:
• Submit a new MI application
• Check application status
• Upload underwriting documents (Non-Delegated only)
• Resubmit if loan data changes
• Activate approved MI coverage near closing
Requesting an MI Application
You have two options:
Option 1:
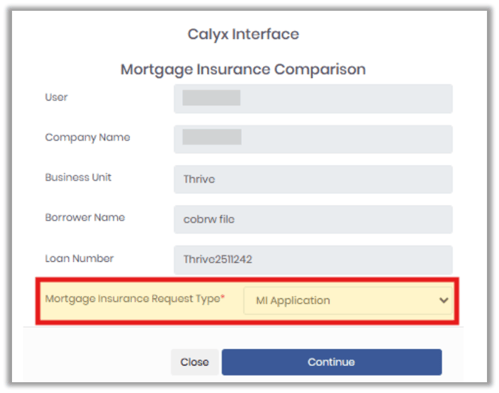
1. Review pre-filled loan and user information.
2. Select MI Application from the dropdown.
3. Click Continue.
Option 2:
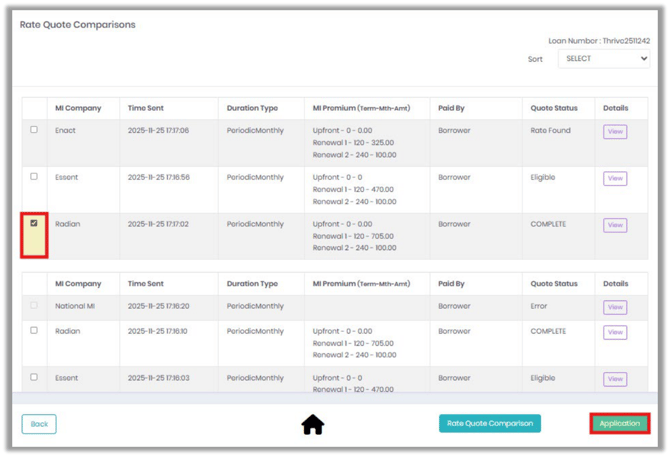
1. From the Rate Quote Comparison screen, select the MI company on the left.
2. Click Application to open the MI request form.
MI Application Screen
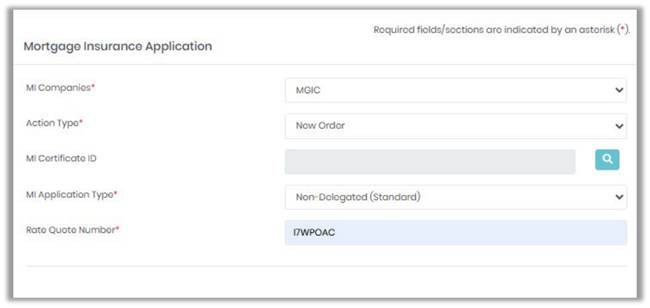
Field & Dropdown Descriptions
• MI Companies*
o Click SELECT to view all available MI companies.
• Action Type*
o Check Status – Retrieves the current status of an existing MI application.
o New Order – Submits a new MI application.
o Resubmission – Sends updated or corrected application data.
• MI Certificate ID
o Enter or search for an existing certificate (leave blank for new applications).
• MI Application Type*
o Delegated – Lender approves MI internally before sending to MI company.
o Non-Delegated (Standard) – MI company reviews and approves directly.
• Rate Quote Number*
o Enter the number tied to your MI quote results.
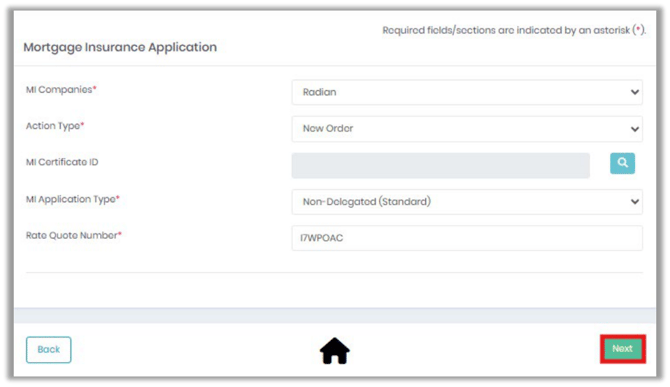
When all required fields have been populated, click Next.
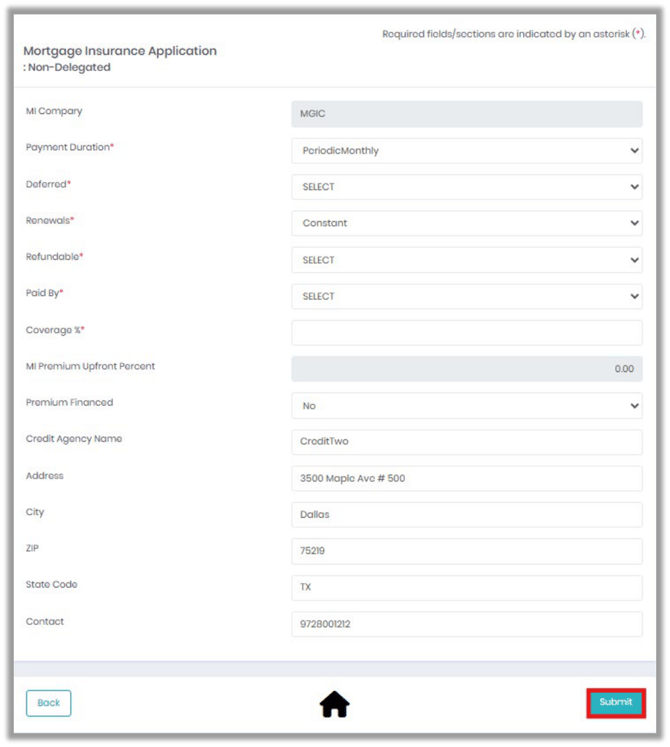
Completing the MI Application Screen
Select and complete all required dropdowns and fields, then click Submit.
After Submitting the MI Application
The system opens the Mortgage Insurance Application: Delegated or Non-Delegated Detail screen, showing:
• Application details
• MI company response
• Required next steps
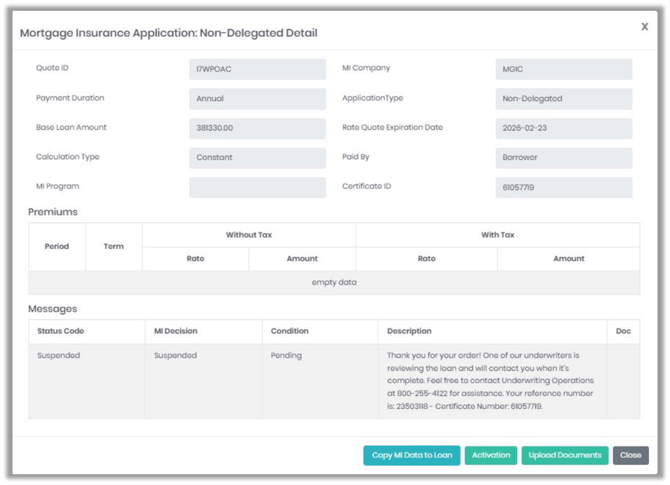
Review Application Details
• Verify:
o MI Company
o Application Type
o Base Loan Amount
o Paid By
o Certificate ID
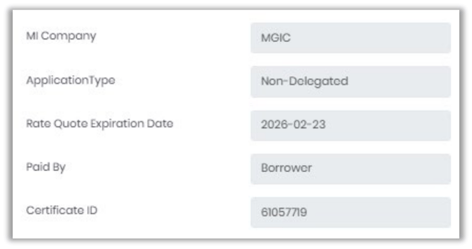
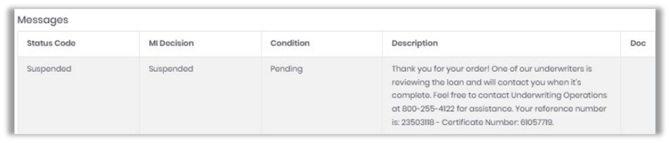
Check the Messages Section
• Review:
o Status Code
o MI Decision
o Condition
• Description explains next steps (e.g., Pending, Suspended, Approved)
Uploading Documents (Non-Delegated Only)
Depending on the MI company’s response:
If non-delegated and documents are needed:
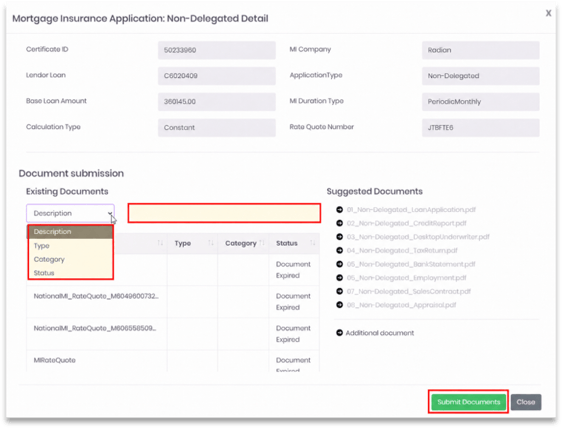
1. Click Upload Documents to submit required underwriting documents.

2. View the MI company’s Suggested Document List (varies by MI provider).
3. Match existing Path documents to the correct MI document types.
4. Add additional documents if needed.
5. Use the search and filter options to locate documents by Description, Type, Category, or Status.
6. Click Submit Documents.
Note:
• Suggested names are templates from the MI company.
• You can upload additional documents later.
• Duplicates are allowed (MI company decides what’s acceptable).
Checking (MI) Application Status
1. Go to MI Application → Check Status.
2. Select the previous application.
3. View the updated status from the MI company.
Activating MI (Final Step at Closing)
If approved:
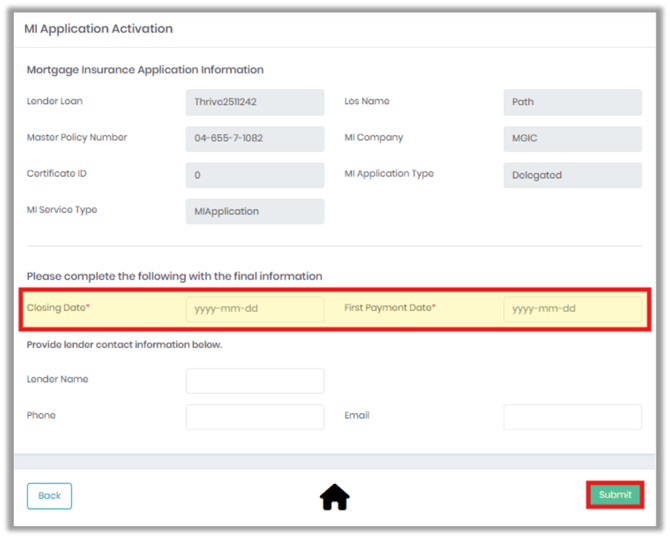
1. Click Activation to activate MI coverage at closing.

2. Confirm loan, MI company, and policy details.
3. Enter:
o Closing Date (actual closing date)
o First Payment Date (usually one month after closing)
4. Optional: Update lender contact details.
5. Click Submit to activate MI coverage.
6. Use Back to return to the previous screen if needed.
Copying MI Data to the Loan File
To sync MI details:
1. Click Copy MI Data to Loan.

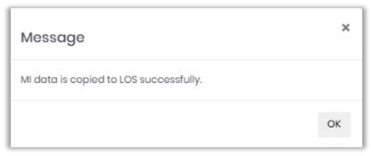
2. A confirmation message appears when successful.
3. Click Close to return to the MI Application menu.
4. When MI data is successfully copied to the loan file, a confirmation message will appear at the top of the screen.
5. Click Close to return to the MI Application menu.

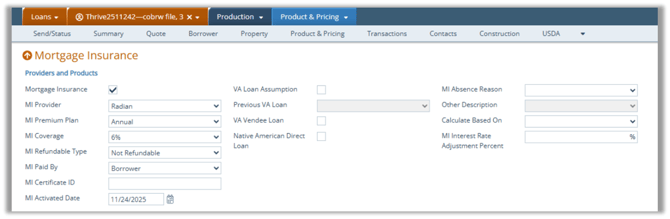
Additional Views
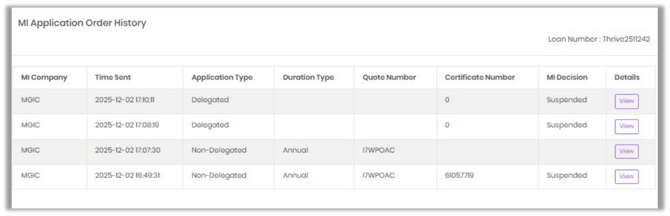
(MI) Application Order History
• View-only record of all MI applications submitted on that loan
• No user actions required
MI Activation Result
• Displays the most recent MI activation result
• Not a historical list — last activation only