This process allows you to add borrower, co-borrower, or loan originator e-signature fields to any Custom Form to be electronically signed through Zip.
Access the Custom Form
- Select the Templates tab from the navigation pane.
- Select Custom Forms / Letter / Email.
- Click on the custom document to highlight.
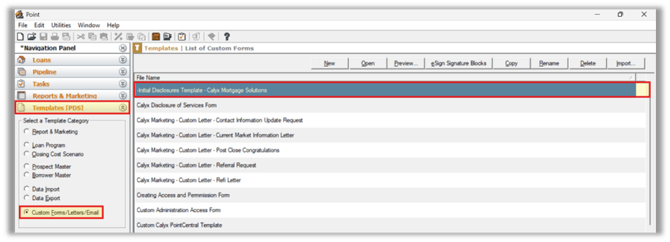
4. Click eSign Signature Blocks to open the selected document in the INK-it Designer.
![]()
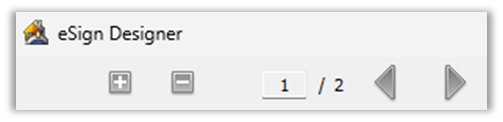
Designer Tools:
- Select (+ / –) → Zoom in or out.
- Select Left / Right Arrows → Scroll the form horizontally.
Choose Signature Settings
- Select the signature requirement using Select Signature Type:
- Full Signature
- Initials Only
- Select the required signer using Select Signer:
- Borrower
- Co-Borrower
- Loan Originator

Insert and Position Signature Blocks
- Click Insert Icon to add the signature block to the form.

2. Grab the block with your cursor and move it to the desired location.
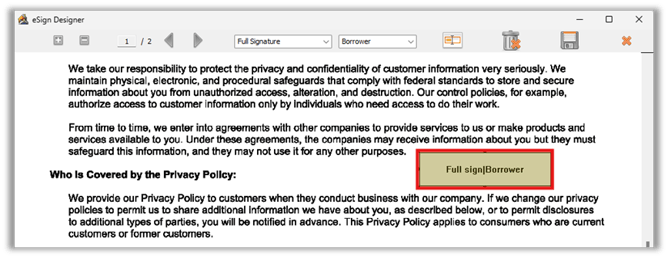
3. Repeat this process for additional signature fields if needed.
Save or Remove Signature Blocks
1. Click the Save Icon to save the form with all signature blocks included.
2. To remove a block, select it and click the Trash Can icon.

Summary
By following these steps, users can quickly add, position, and manage e-signature fields on custom forms, ensuring documents are fully prepared for INK-it electronic signing and streamlined borrower workflow.