DataVerify Verifications in Point allows you to submit verification requests for borrowers or legal entities directly from a loan file. This article covers how to access DataVerify, select the appropriate verification type, submit a new order, enter credentials when prompted, upload supporting documents when required, and complete submission for processing.
Navigate to DataVerify Verifications
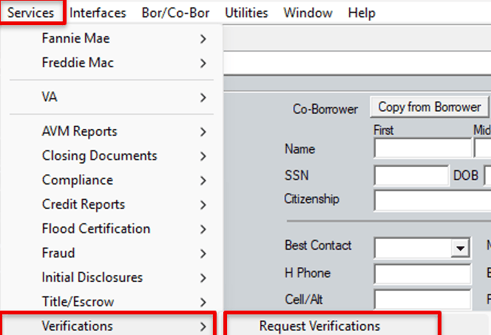
- Open a loan file.
- Navigate to Services → Verifications.
- Select Request Verifications.
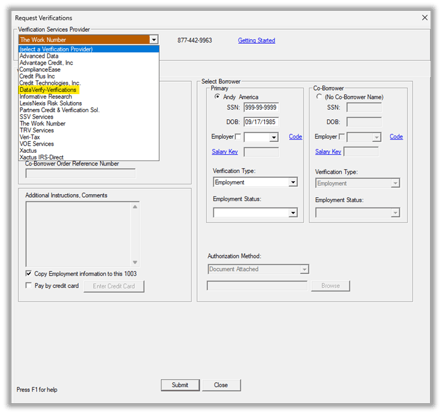
4. Choose DataVerify Verifications from the available providers.
Select a Verification Type
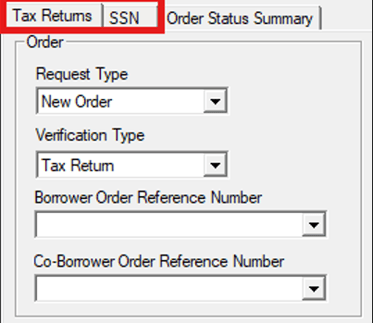
- Select the Tax Returns tab or Social Security Number
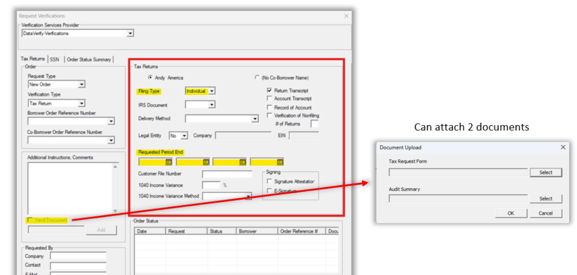
Submitting a New Order
1. Set Request Type to New Order.
2. Select the applicable borrower or co-borrower.
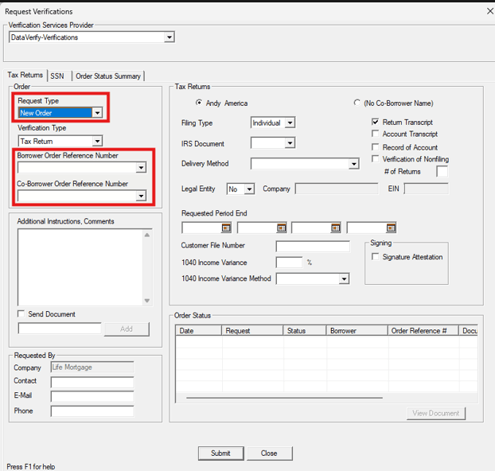
3. Choose the filing type and request period, if applicable.
4. Upload required documents if prompted.
5. Select Submit.
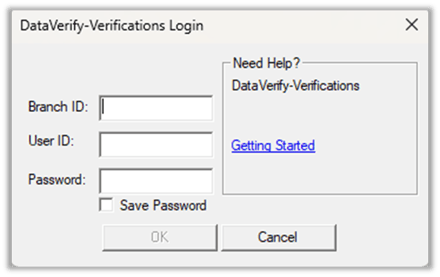
Enter Credentials (When prompted)
After selecting Submit on the Request Verifications screen, the DataVerify Verifications Login window appears, prompting you to enter your credentials.
- Enter your Branch ID, User ID, and Password.
- (Optional) Select Save Password.
- Click OK.
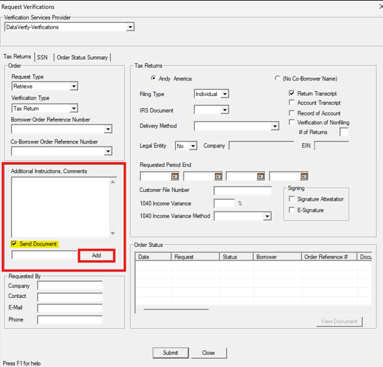
Upload Documents (If required)
DataVerify requests require supporting documents at submission. Uploading the correct files ensures successful processing and prevents delays or rejections.
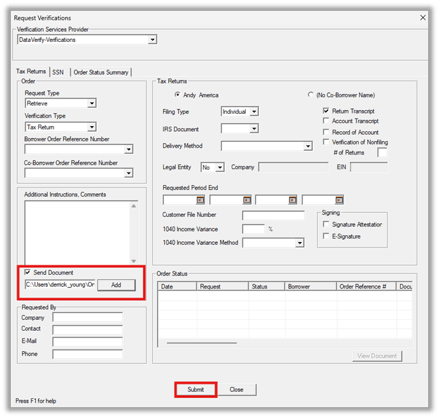
- Locate the Send Documents
- Check the Send Document checkbox, and then click Add.
3. Click Select next to Tax Request Form or Audit Summary (whichever document you want to upload).
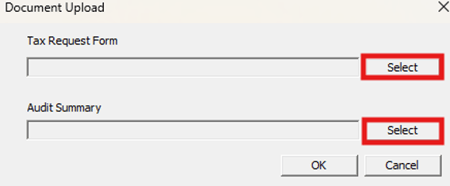
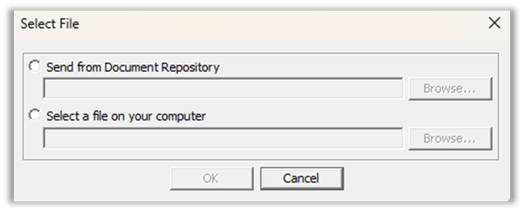
4. On the Select File window, choose one of the following options:
• Send from Document Repository, or
• Select a file on your computer.
5. If Send from Document Repository is selected, click Browse to highlight a file stored in the document repository and click Select when complete.

6. When Select a file on your computer is selected, click Browse to locate a file saved on your computer.
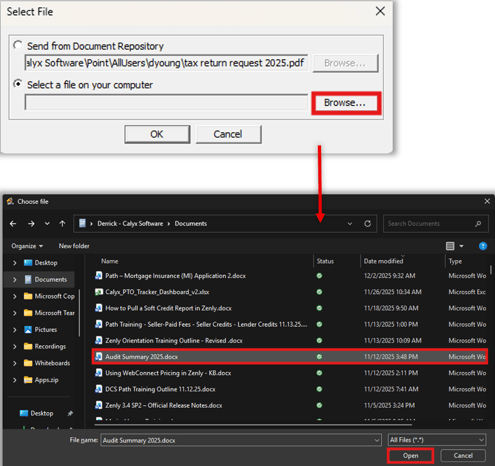
7. Select the desired file and click Open.
8. Verify all required documents are attached.
9. Click OK to attach the file.

10. Select Submit to send the verification request.
⚠️ Note: You can attach two documents.
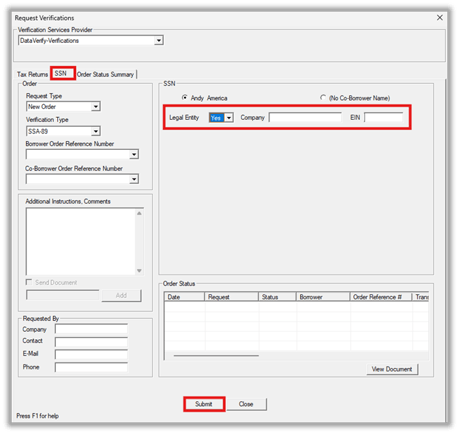
Submit a Legal Entity Verification (SSN Tab)
- Navigate to Services → Verifications → DataVerify and select the Social Security Number (SSN)
- Set Legal Entity to Yes, then enter the Company Name and EIN.
- Complete the verification details and select Submit.
What Happens After Submission
- Documents are reviewed as part of the verification process.
- Verification status updates appear in the Order Status table.
- Completed results are stored in Document Storage.
Summary
Submit a new verification by selecting the appropriate tab, setting Request Type to New Order, and selecting Submit. If prompted, enter credentials. If required, upload supporting documents. For legal entities, enable Legal Entity on the SSN tab and submit using Company Name and EIN.