Networking the PNTTEMPL folder allows all computers to share reports, cardex, and other templates that are available under the Templates tab in the Navigation Panel.
Two procedures are included in this topic:
- Preparing the main computer or server
- Connecting other computers to the main server
Preparing the main computer or server
- Go to the computer that contains the templates (Closing Cost Scenarios, Loan Programs, Cardex, etc).
- Open Windows Explorer.
- Right-click My Computer/Computer and select Properties.
- Go to the Identification or Computer Name/Description tab.
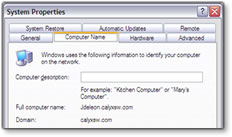
- Refer to the Full computer name that appears and write it down.
- Close the System Properties window.
- Double-click My Computer/Computer.
- Double-click Local Disk (C:).
- Right-click the PNTTEMPL folder and select Properties.
- From the PNTTEMPL Properties window, click the Sharing tab.
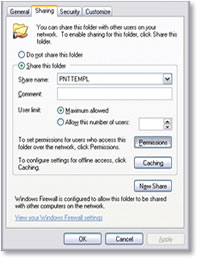
- Select Share This Folder.
- Click the Permissions button.
- In the Permissions for PNTTEMPL window, highlight Everyone and insert a check into the Full Control checkbox under the Allow column.
- Click OK.
Connecting other computers to the main computer
- Close Point.
- Open Point Administrator by going to the desktop and selecting Start > Programs > Calyx Software > Point Administrator.
- In the Change Template Directory section, click Change Template Directory.

- In the Change Template Directory window, click Browse.
- Scroll down and expand My Network Places. Click the plus sign to expand the folder.
- You may have to expand some other options, such as Entire Network, Microsoft Windows Network, or Workgroup.
Eventually all the computer names on the network appear. One of these names is the Full computer name that you wrote down in step 5 of Preparing the main computer or server.
- Expand the main computer name.
- Highlight PNTTEMPL and click OK.
- Click OK in the Template Folder Manager window.
- The following message appears: Point Template location has been successfully changed to ... [name of new template directory].
- Click OK.
- Exit Point Administrator.
- Open Point and verify that the correct templates are present.
The Cardex, Closing Cost Scenarios, Loan Programs, and other templates should now be available to other users.
For each workstation, perform the steps described in the Connecting other computers to the main computer section above.