2815 Exporting Cardex records to create mailing labels
The Cardex Database can be exported to a delimited text file, which can then be imported into other applications such as Microsoft Outlook, Excel, or Word.
Exporting the Cardex records
1. Open Point.
2. From the Menu bar, select Utilities > Cardex Database.
3. From the Menu bar, select File > Export.
4. In the Export Custom ASCII window, keep the default options.
5. Click Export.

6. In the Export Cardex window, select Desktop in the Save in.
7. In the File Name field, keep the file name as Pointcardex.txt.
8. Click SAVE.

The Cardex Database will be exported to a comma delimited text file. You can import this text file into other applications such as Word, Outlook, or Excel. A brief summary of importing the exported Cardex records into other applications is below:
Importing into another Cardex Database
You can import the exported records into another Cardex Database. This is useful if you are transferring your data from one computer to another.
-
Open Point on the computer to which you are importing the exported cardex records.
-
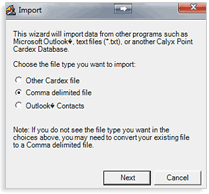
Open the Cardex Database and from the menu bar select File > Import > Comma Delimited File and then click Next.
-
Browse to and locate the exported cardex file and then click Next.
-
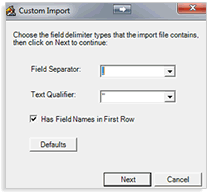
From the Custom Import window, leave the default settings if you used the above instructions to export the Cardex and then click Next.
(Note: You can import any records from a delimited text file and you can adjust these settings if necessary to match the type of text file you are importing.) -
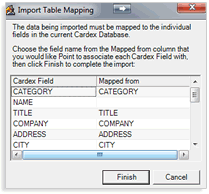
From the Import Table Mapping window, click Finish once you have checked that all fields in the Cardex Field column are matched with the fields in the Mapped From column.
-
Perform a search and your imported records should be there.
Importing into Microsoft Word
Once you have exported the Cardex records to a comma delimited text file, you can import the records from the text file into Microsoft Word by using the following steps:
- For MS Word 365: Open Microsoft Word and click Mailing > Start Mail Merge. Select whether you are generating letters, envelopes, or labels. Click Select Recipients > Use Existing List. Choose the Desktop folder to select PointCardex.TXT. Click Insert Merge Fields to place fields in appropriate place. Click Finish & Merge to complete Mail Merge process.
-
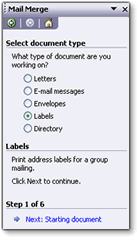
For MS Word 2000/2003: Open Microsoft Word and from the menu bar select, Tools > Letters and Mailings > Mail Merge. Select whether you are generating letters, envelopes, or labels. Please see Microsoft Word Help documentation for more information on importing text files.
-
For MS Word 2007/2010: Open Microsoft Word and from the menu bar, select the Mailings tab. Click the Start Mail Merge option from the menu bar and then select whether you are generating letters, envelopes, or labels. Please see Microsoft Word Help documentation for more information on importing text files.
Importing into Microsoft Excel
Once you have exported the Cardex records to a comma delimited text file, you can import the records from the text file into Microsoft Excel by using the following steps:
- For MS Excel 365: Open Microsoft Excel and then from the menu bar select, Data > From Text/CSV. From the Import Data menu select the folder Desktop to select the PointCardex.TXT file. Click Import button to Preview the data. Click Close & Load to complete import.
-
For MS Excel 2000/2003: Open Microsoft Excel and then from the menu bar select, File > Open. Select All Files from the File Types dropdown list and then navigate to the text file you exported from the Cardex and double-click on it. Set the appropriate options in Excel to import the information.
-
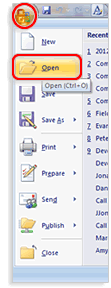
For MS Excel 2007/2010: Open Microsoft Excel and then from the menu bar, select the Microsoft icon from the upper left corner and click Open. Select All Files from the File Types dropdown list to the right of the File Name field, and then navigate to the exported Cardex file and double-click on it to import it.
