Several steps are included in this topic:
- Preparing the Outlook Address Book for import
- Importing from Outlook to Cardex
Preparing the Outlook Address Book for import
- Open Microsoft Outlook®.
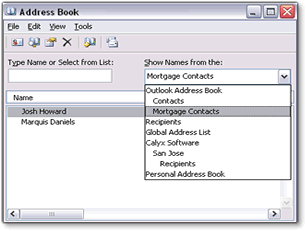
- From the Menu bar, select Tools > Address Book.
- Point can only import contacts from the Outlook Address Book. Note: Only Outlook Contacts with E-mail Addresses are imported into Cardex.
- In the Show Names from the dropdown list, select one of the categories under Outlook Address Book to view the available contacts.
Note: Point can only import contacts from the Outlook Address Book. To import contacts from a Personal or Windows Address Book:
a. Hold down the <Shift> key while selecting the first and last contact.
c. Close the address book.
b. Right-click and select Add to [name of the Outlook Address Book]. - Go to the Folder List pane on the left and open the Contacts folder.

- Under My Contacts, right-click your Address Book and select Properties.
- Click the Outlook Address Book tab.
- Select Show this Folder as an Email Address Book.
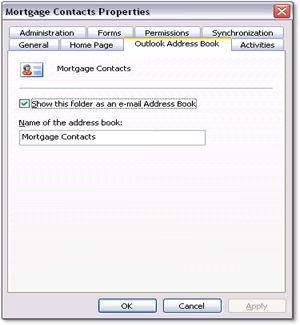
- Click Apply.
- Click OK.
- Close Outlook.
Importing from Outlook to Cardex
- Open Point.
- From the Menu bar, select Utilities > Cardex Database.
- When the Cardex Database opens, go to the Menu bar and select File > Import.
- In the Import window, select Outlook Contacts and click Next.
- If you are prompted, choose the profile containing your Outlook Address Book and click OK.
- The Outlook Address Books window opens with the books available for import. Select the desired book or books and click Next.
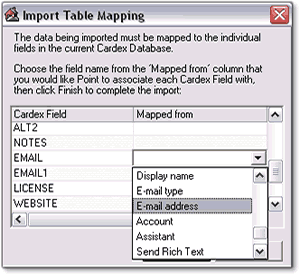
- On the Import Table Mapping screen, the Cardex fields appear in the left column. Select the correct Outlook Address Book field in the Mapped From column then click Finish.
Search the Cardex Database to verify that the information imported correctly.