SQL Server 2014 Express Edition
1. Download SQL Server 2014 Express Edition.
2. When the download is complete, launch the .exe file.
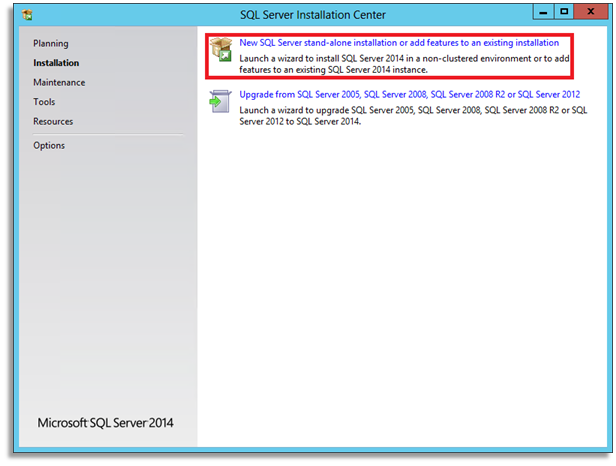
3. Select Installation from the left pane and select New installation or add features to an existing installation.
4. Select the I accept the license terms check box.
5. To send information about how you use SQL and its components, select the Send feature usage data to Microsoft… check box.6. Click Next.
The Setup Support Rules dialog box is displayed.

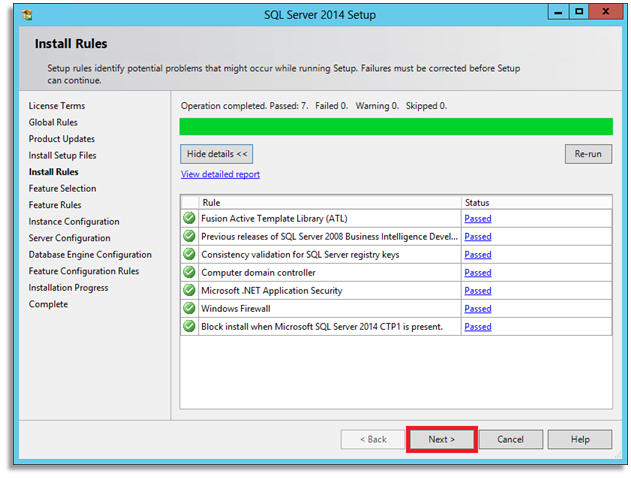
7. If any error checks have failed, click the Show details button to view the details and resolve.
8. After the errors are resolved, click Re-run to run the check again. Repeat until all errors are resolved.
9. Click Next.
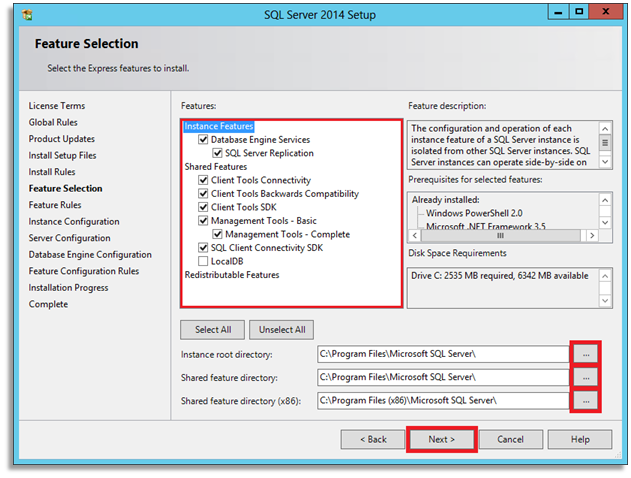
The Feature Selection dialog box is displayed.
10. Retain the default settings.
11. To change the Shared feature directory, click the ellipses button (…) to specify the directory.
12. Click Next.
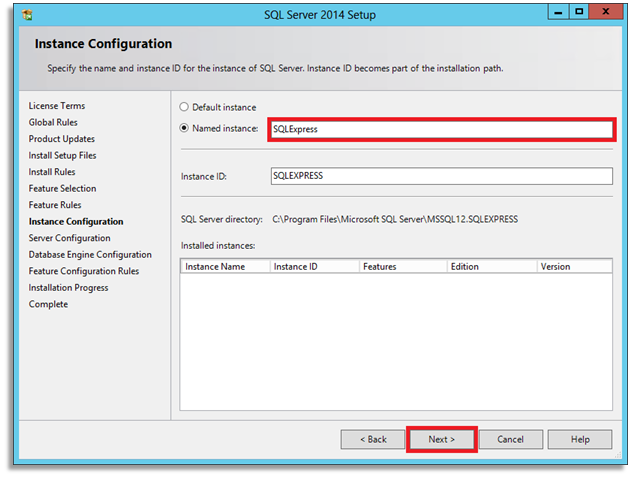
13. Rename the SQL instance in the Named instance field if you do not want to use the default name.
14. To change the Instance root directory, click the ellipses button (…) to specify the directory.
15. Click Next.
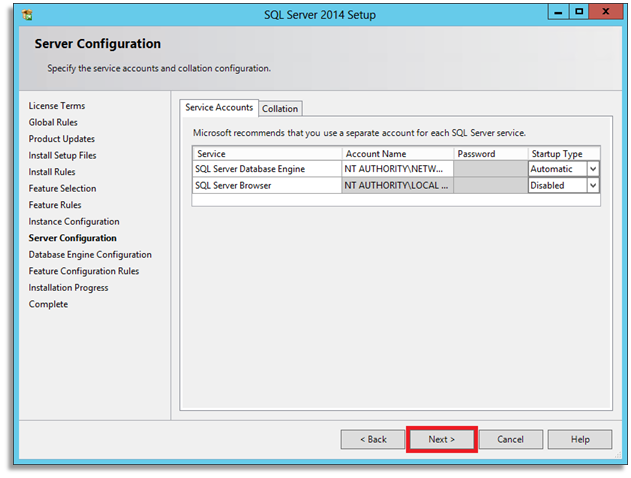
16. Specify the Account Name.
Note: You can use the default account for the SQL Server services, however, it is recommended that you use the Network Services account to avoid issues with the installation.
17. Click Next.
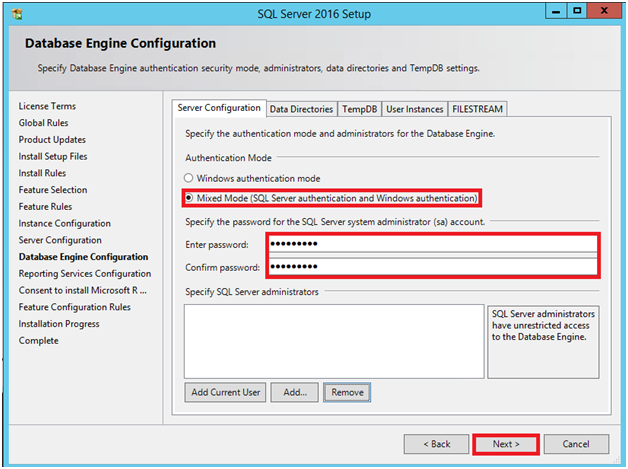
18. Select Mixed Mode from the Authentication Mode section.
19. Specify the password for the SQL Server system administrator account (sa password), and select the Windows NT account where it applies on the local machine.
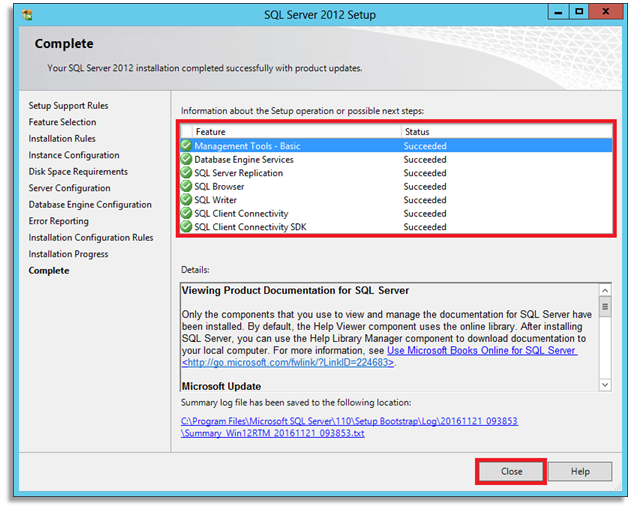
Note: This is typically your domain admin account, but can also be any local/domain account, depending on how you log in to the server.

20. Select the Send Windows and SQL Server Error Reports to Microsoft… check box if you want to enable sending error reports to Microsoft.
21. Click Next.
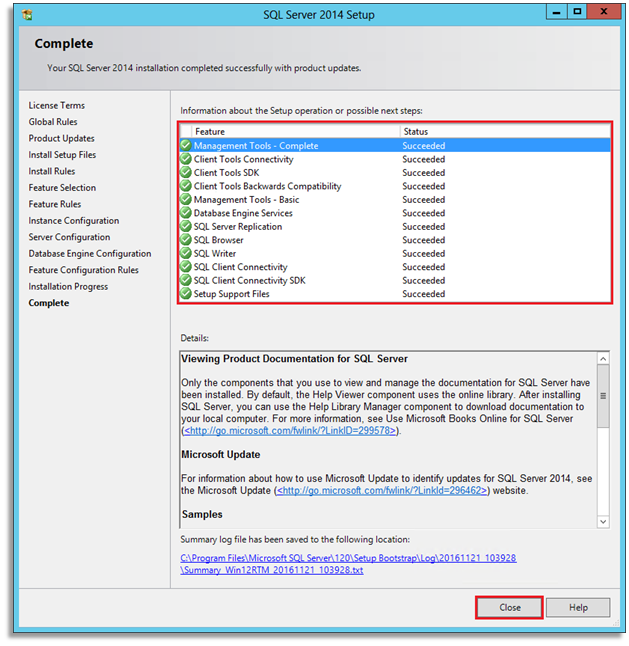
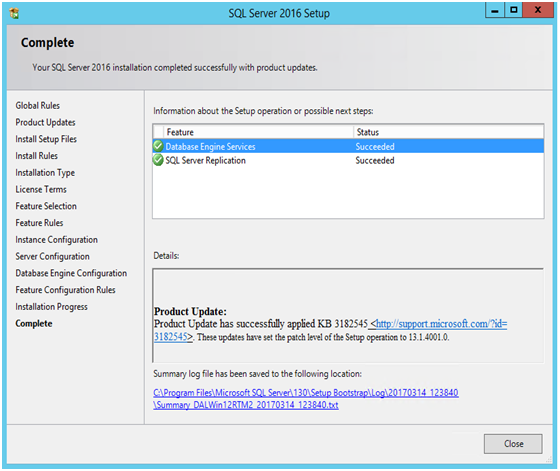
22. Click Close when the installation is complete.
SQL Server 2016 Express Edition
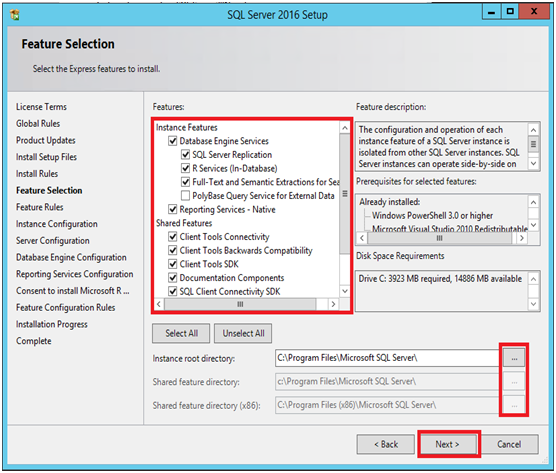
The Feature Selection dialog box is displayed.
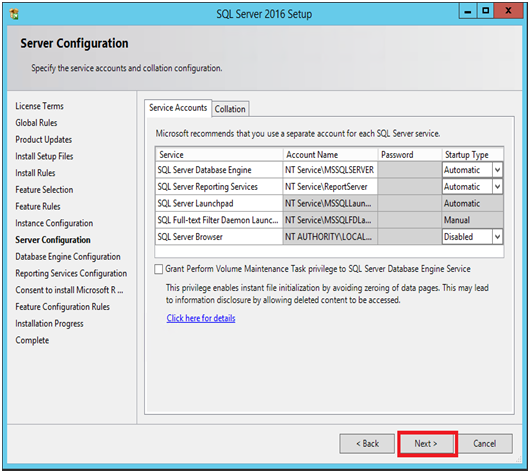
You can use the default account names for the SQL Server services in the Server Configuration screen, but if you have any issues with the install it is recommended to use the Network Services account.
Note: Typically this is your domain admin account, but can also be any local/domain account depending on how you log in to the server.
1. Download SQL Server 2016 Express Edition.
2. When the download is complete, launch the .exe file.
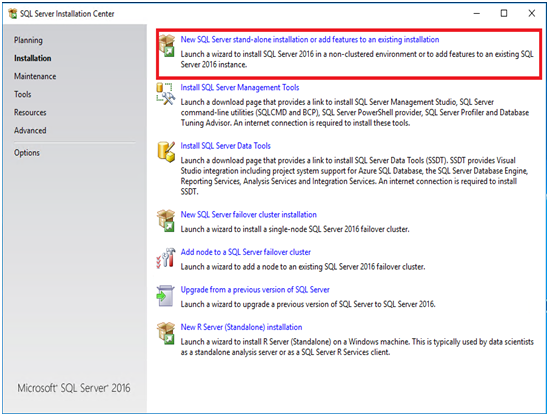
3. Select Installation from the left navigation menu and select New SQL Server stand-alone installation or add features to an existing installation.
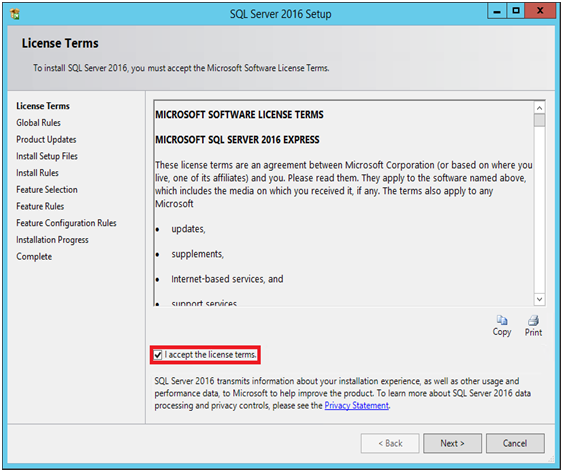
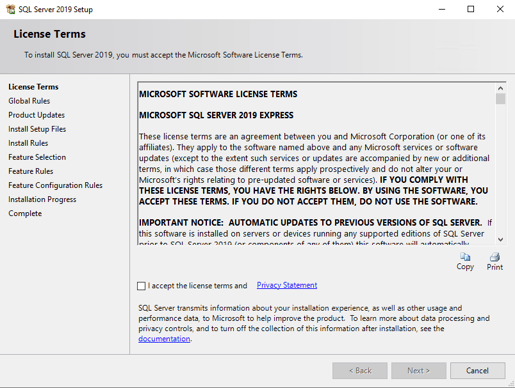
4. Select the I accept the license terms check box.
5. Click Next.
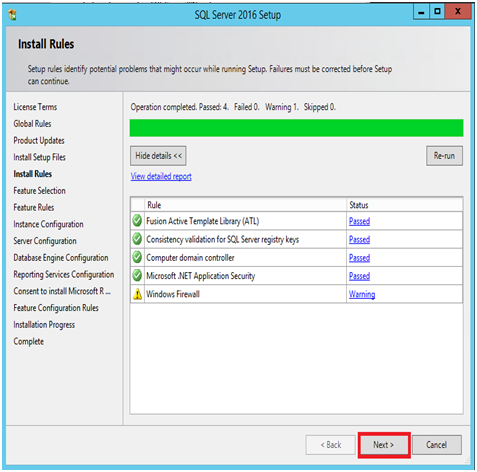
6. If any error checks have failed, click the Show details button to view the details and resolve.
7. After the errors are resolved, click Re-run to run the check again. Repeat until all errors are resolved.
8. Click Next.
9. Retain the default settings.
10.Click Next.
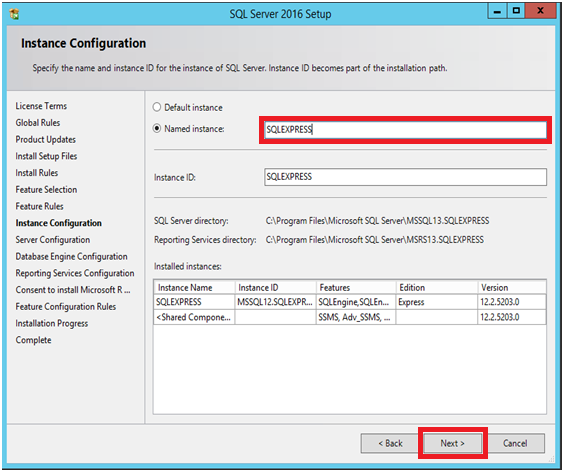
11. Rename the SQL instance in the Named instance field if you do not want to use the default name.
12. Click Next.
13. Click Next to continue.
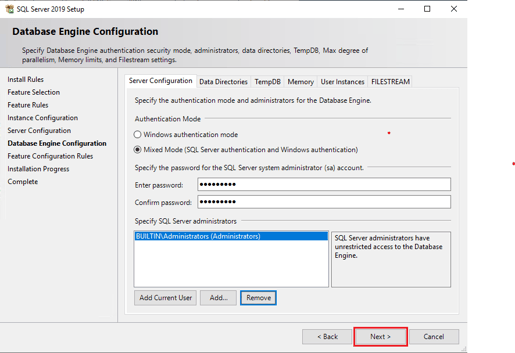
14. Select Mixed Mode in the Authentication Mode section.
15. Specify the SQL system administrator account (sa password), and specify a Windows NT account on the local machine as the SQL Server administrator.
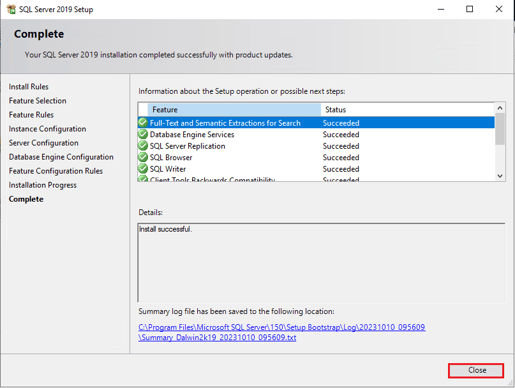
16. Click Close when the installation is finished.
SQL Server 2019 Express Edition
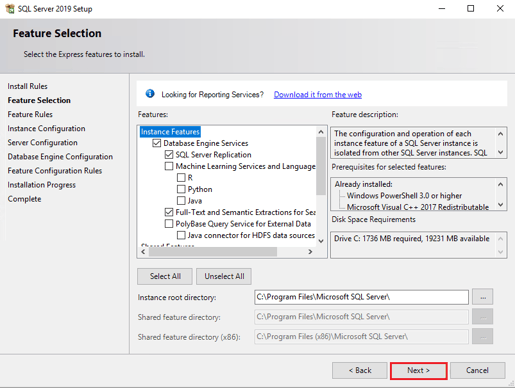
The Feature Selection dialog box is displayed.
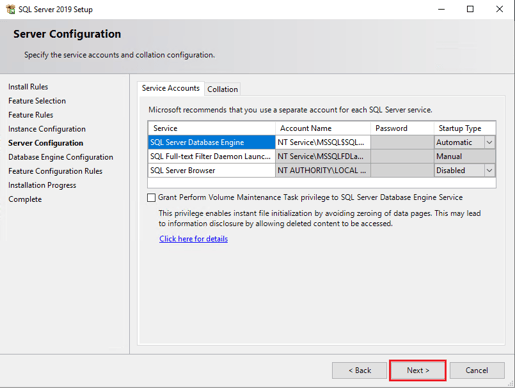
You can use the default account names for the SQL Server services in the Server Configuration screen, but if you have any issues with the install, it is recommended to use the Network Services account.
Note: Typically, this is your domain admin account, but can also be any local/domain account depending on how you log in to the server.
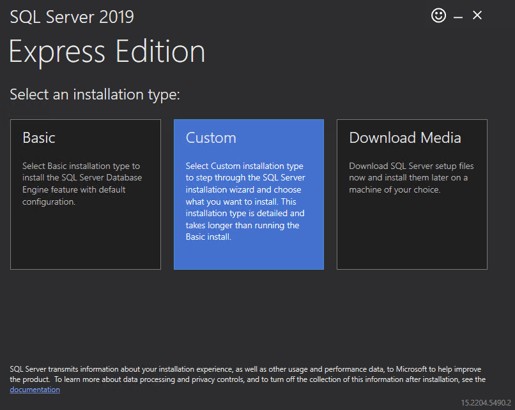
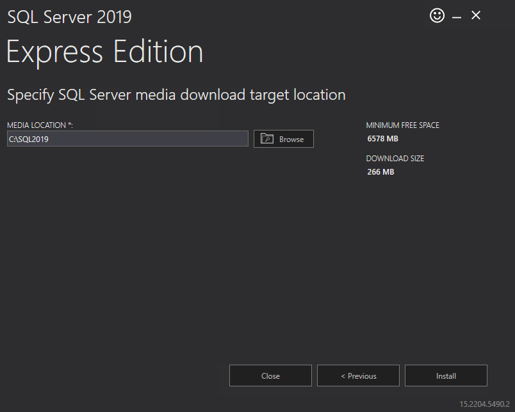
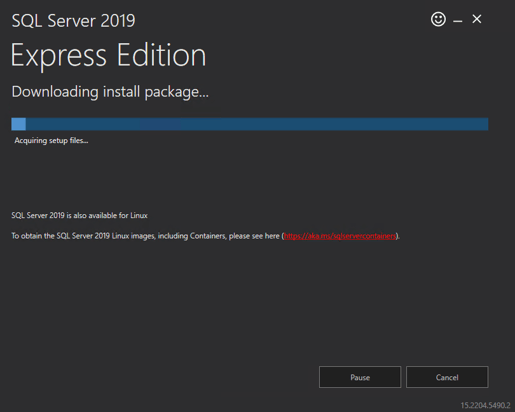
- Download SQL Server 2019 Express Edition.
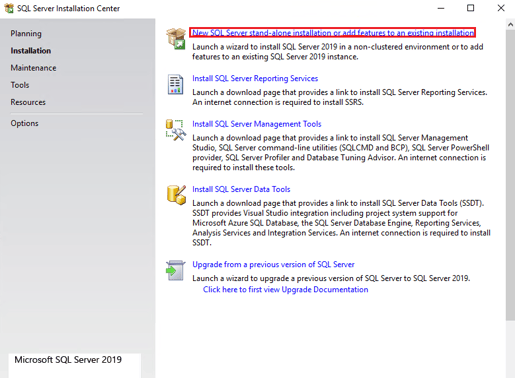
3. Select Installation from the left navigation menu and select New SQL Server stand-alone installation or add features to an existing installation.
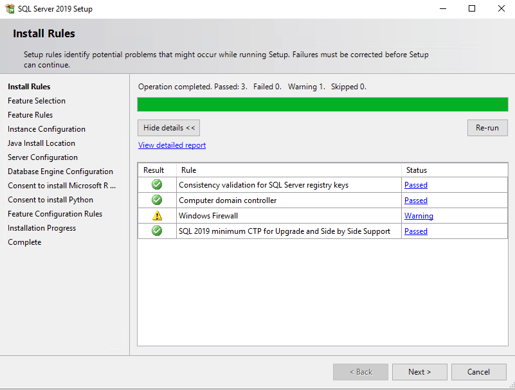
6. If any error checks have failed, click the Show details button to view the details and resolve.
8. Click Next.
10. Click Next.
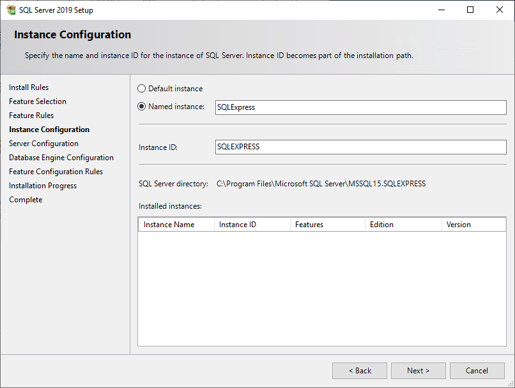
11. Rename the SQL instance in the Named instance field if you do not want to use the default name.
12. Click Next.
15. Specify the SQL system administrator account (sa password), and specify a Windows NT account on the local machine as the SQL Server administrator.
Installing SQL Server Management Tools - Server 2016 Express Edition
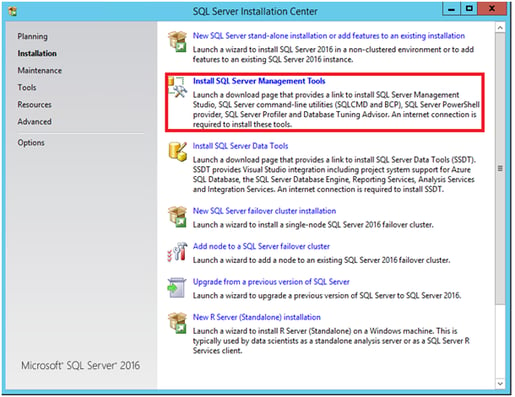
The SQL Server Installation Center is opened.
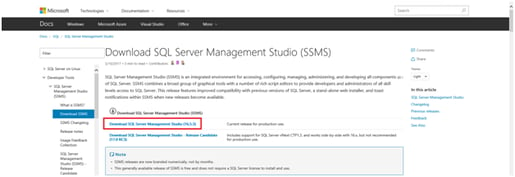
The Download SQL Server Management Studio screen is displayed.
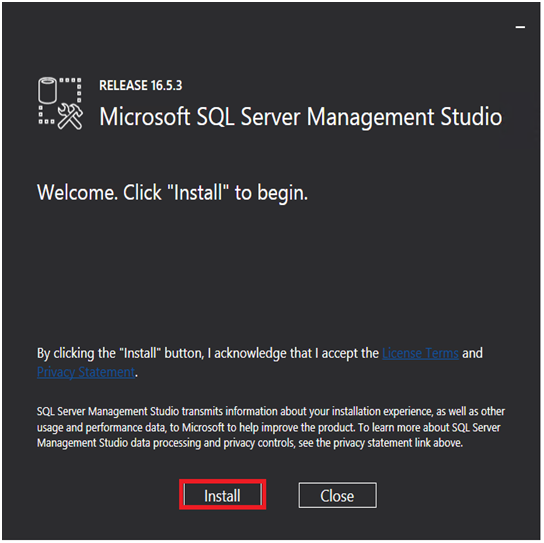
The Welcome screen is displayed.
1. Launch the .exe file you downloaded from the Microsoft website or from MyCalyx.com.
2. Select Install SQL Server Management Tools.
3. Click Download SQL Server Management Studio.
4. Click Install.
5. Click Close when installation is finished.