Creating a print group that is accessible only to your computer
- Open Point.
- From the Menu bar, select File > Print.
- Click the Print Groups tab.
- At the bottom of the left pane, click Create Group.
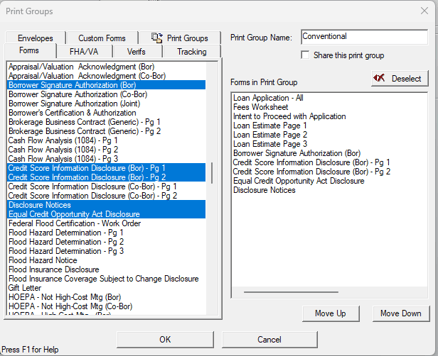
- Select the forms you want to add to a group.
- In the Print Group Name field in the top right corner, enter a name for the group.
- Do NOT enter a check in the Share this print group box.
- Click OK.
Creating shared print groups
- Open Point.
- From the desktop, select File > Print.
- In the Borrower Forms window, click the Print Groups tab.
- At the bottom of the window, click the Create Group button in the left pane.
- On the Forms tab on the left, select the forms you want to add to the group.
- In the top right corner, go to the Print Group Name field and enter a name for the group.
- To share the print group, insert a check in the Share this print group box, and click OK.
Note: Shared print groups can be accessed by other computers on the network if the PNTTEMPL folder is shared on a network and is connected from all the workstations. See article 1903 Networking the PNTTEMPL folder for shared Cardex and Templates.