1. Open Point Administrator by going to the desktop and selecting Start > Programs > Calyx Software > Point Administrator.
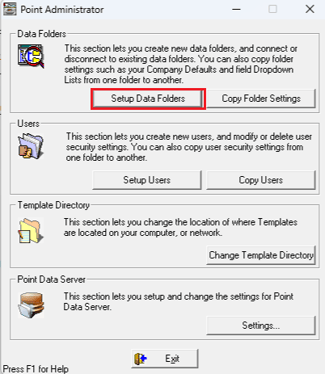
2. In the Data Folders section, click Setup Data Folders.
4. In the New Folder Supervisor Password window, enter a password and click OK. The password will be used to manage the folder.
5. Verify the password.
Note: The password is case–sensitive. Please write it down for future reference.
6. In the Create New Data Folder window, click in field 1.
7. Enter a location for the new folder, for example, C:\New Closed Loans. If you are creating the folder on a network location, enter the path where the folder where be created. (For example, servername\Processing or G:\Archive 2015.)
Note: Do not create a new data folder inside of the Winpoint folder as the Winpoint folder may be removed when you uninstall or install a new version of Point.
8. In field 2, enter the name of the data folder. The data folder name will be displayed within Point. (example Closed Loans or Processing)

-
- Optional: In the Copy From dropdown list, select a data folder from which folder settings will be copied, (dropdown lists, company information, etc.). Check Include User Security Settings if you want to copy the security settings.
- Click Create.
- The Modify Data Folder Properties window allows you to modify the folder name and enable security.
9. If you want to restrict access to the folder using Point security, click Yes. If you do not want to restrict access, accept the No default. See article 2705 Setting up Point Security if you are setting up security to access Point.
10. Select Yes for Available to users.
11. Click OK. The new folder should appear in the Data Folder Manager window.
12. Exit Point Administrator.